For as long as I can remember, I’ve dreamt of a white kitchen. If you know me, you know I am a sucker for all things white and neutral. When we purchased our home, the whole main floor was already complete so we weren’t able to design the layout or the finishes. My husband completely built the basement, garage, and finished all the landscaping, so we were able to complete those with products that fit our style. The kitchen, on the other hand, was never 100% my style. We always knew one day we would want to change it up a bit. Since our cabinets were in great shape, we knew the best, most cost effective way to do this, would be painting them.

As soon as this pandemic hit, and we were inside ALOT more, I took full advantage and whipped out my “Honey Do” list. If there’s one thing my husband is good at, it’s starting a project! He also is among the very few men who finish projects as fast as they start. (Can I get an AMEN?!) We talked about painting the kitchen cupboards on Saturday, and they were ripped out and getting sanded down on Monday.

Step 1 was to remove all the cabinet faces, label them with the corresponding hardware, and mark the inside of all the cabinets so there is no confusion when you go to put them back. Step 2 – sand every surface that will be painted, so that the primer and paint will stick properly. You have to do a nice scuff, taking the glossy finish off, and clean all the dust off with a tack cloth. Step 3- it’s time to prime! We chose to spray all the door fronts with a paint sprayer, and hand paint/roll anything in the kitchen that could not easily be removed. We hung all the cabinets by drilling holes on the backside, and hanging them from a rack with thin wire. This allowed us to spray both sides in the same coat, and sped up the drying time.
Okay, so here’s where we went wrong folks. Let’s file this under what not to do. We originally bought a latex base primer, but when we primed and painted the cabinets, they had PINK STREAKS all through them.

I know, mortifying. After 1 coat of primer and 2 coats of paint, they were still popping pink. My 4 year old said “but Mommy, pink is your favourite colour, why don’t you like them?” Cute, but not the time son. After speaking to the paint manufacturer, they said they have only seen this happen twice, and we would need an oil base primer to seal over the pink. So there we were, 3 days and 3 coats later, having to start over and re-prime everything. (Insert crying face and possibly the mouth censored emoji) Luckily, after 2 coats of the new KILZ oil based primer, there was no more pink. PLEASE learn from our mistake and start with Oil Based Primer. It will save you time, money, and your sanity. A little warning though, this primer does have a very strong odour, so make sure you have a respirator and well ventilated area when using it. We let the primer dry for the recommended time, and then finished with a thick top coat of white, semi-gloss paint.

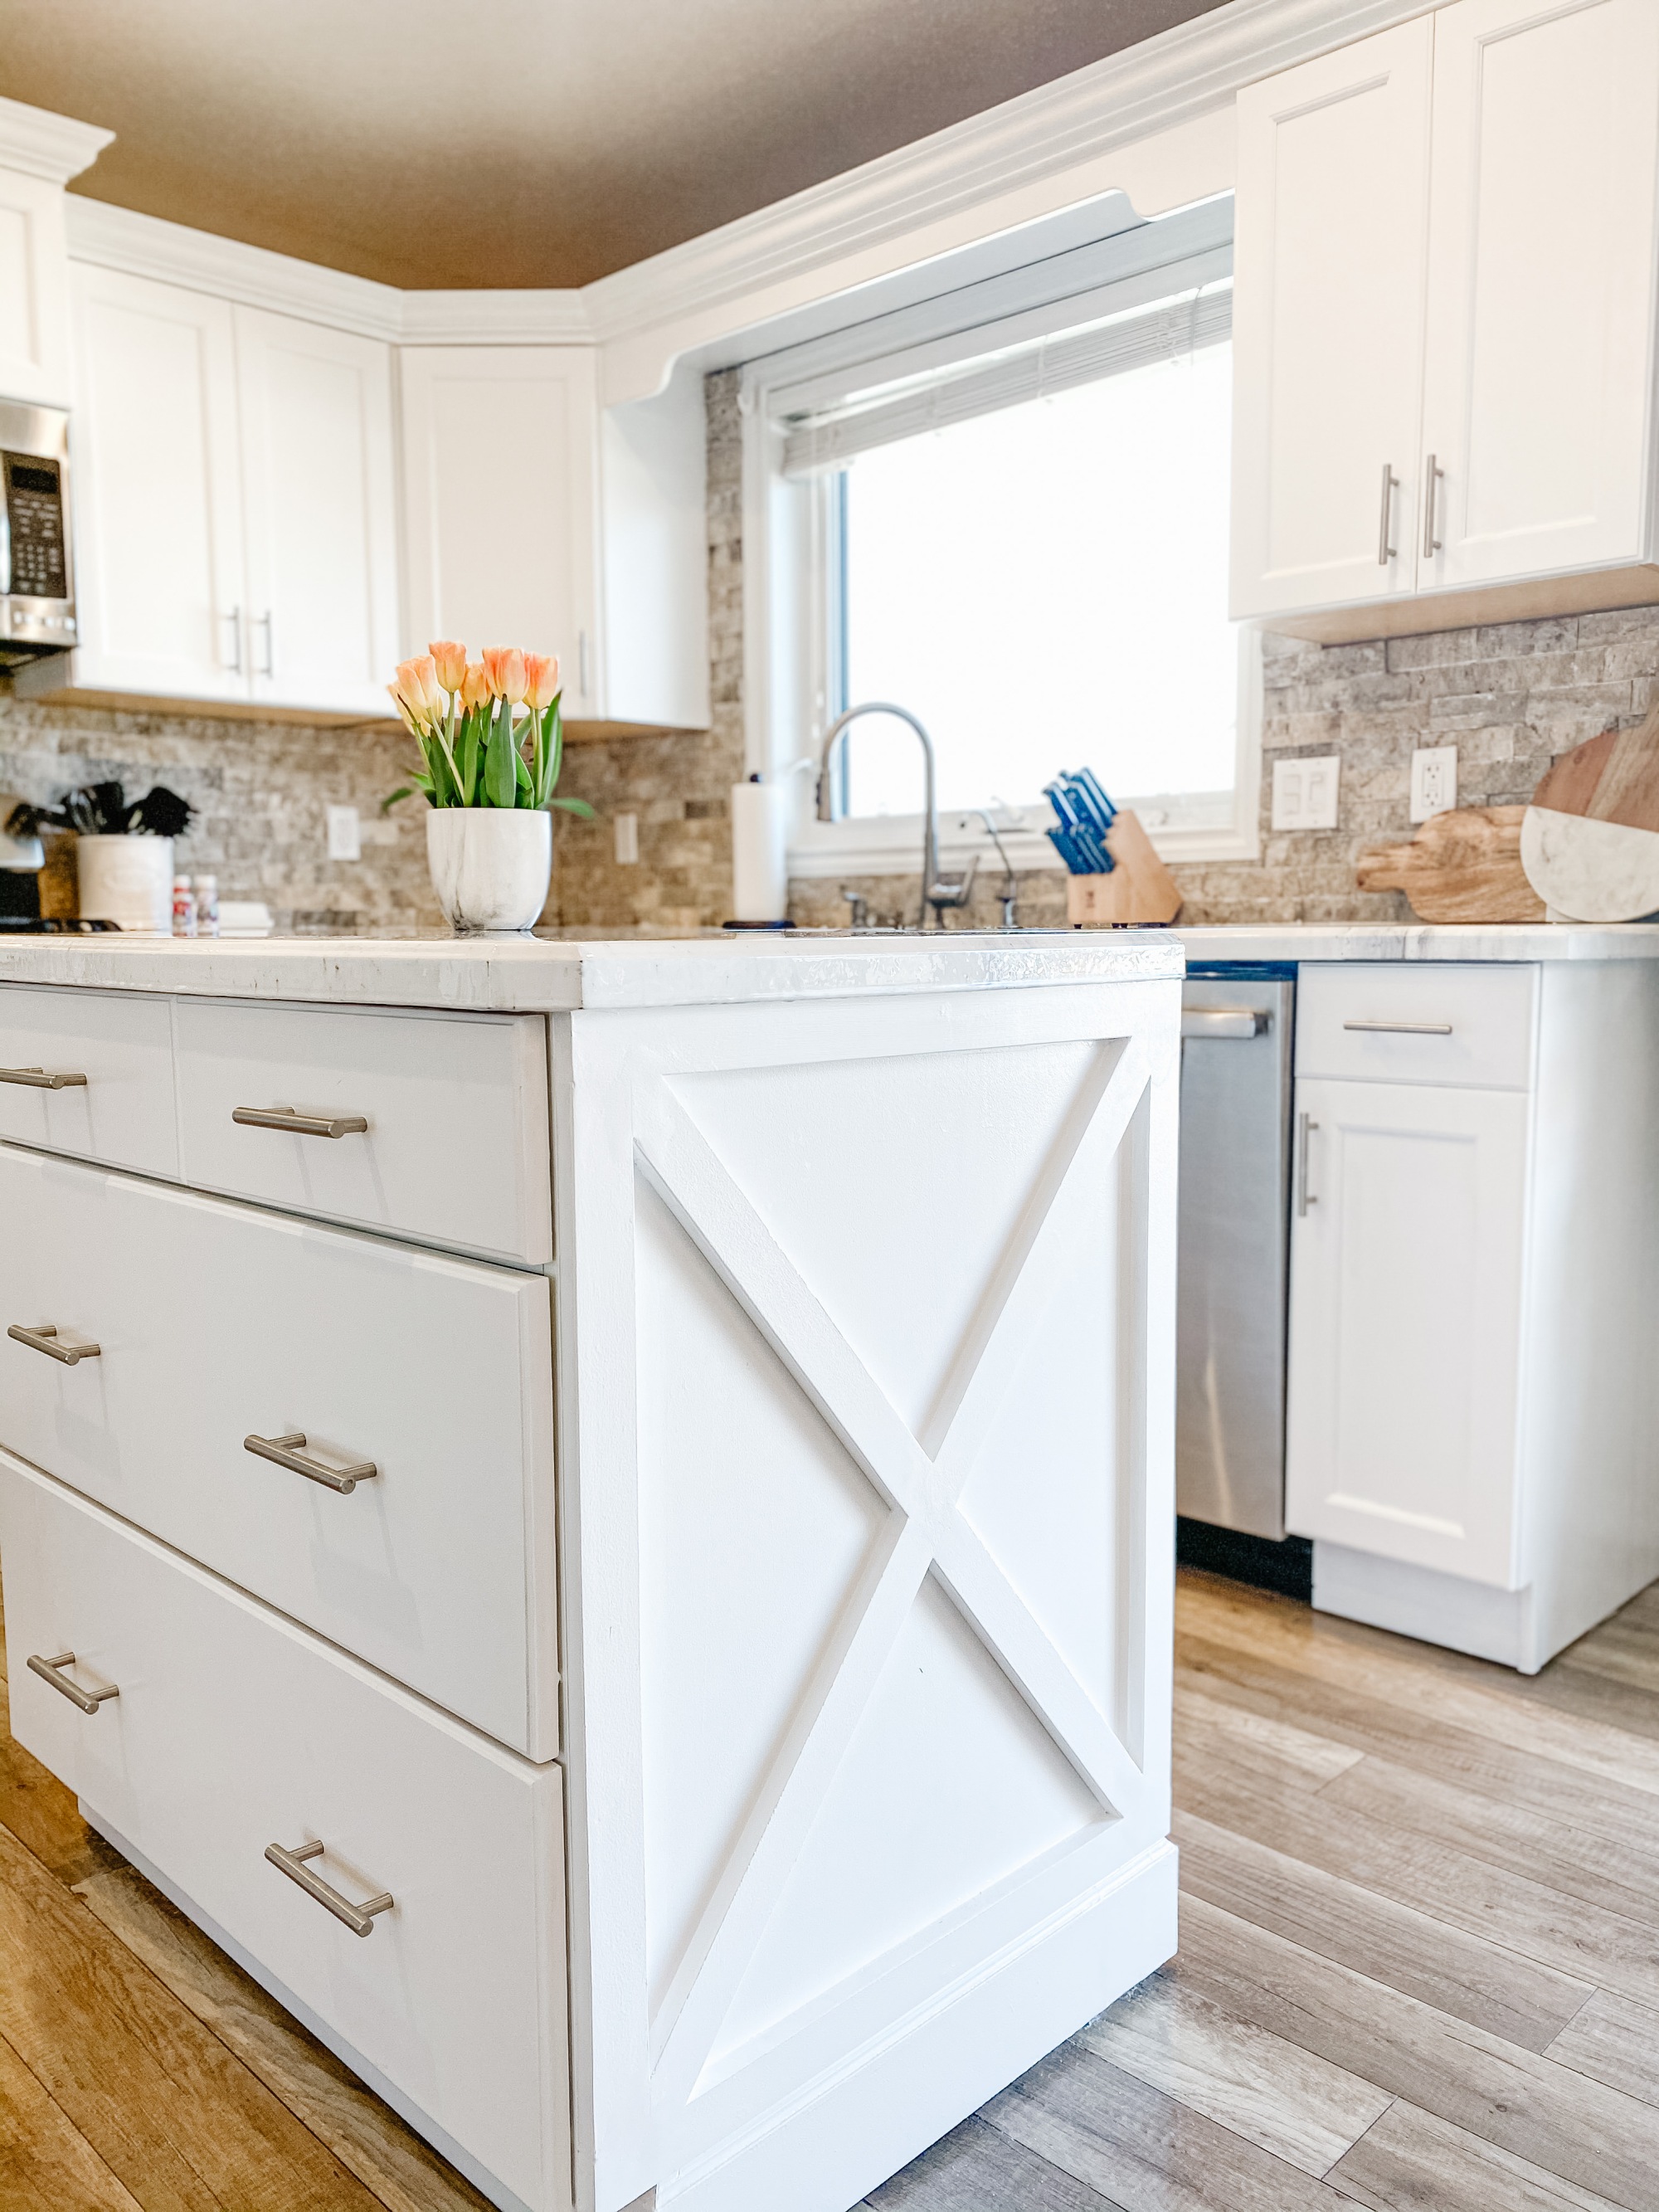
Overall, this project was time consuming and labour intensive, but worth it! The white makes the room feel so much bigger and brighter, and I am so happy with the results! As you can see in the following picture, I had my husband add an X on the island to give it a little more personality, and we also resurfaced the countertops, but that’s a song for another time (If you love country, you know). Seriously though, I’ll have a blog post on how we transformed those brown counters to a clean white marble look. Stay tuned.

Now, on to the next one!

Turned out so beautiful! Love the character the X added to the island ❤️
LikeLiked by 1 person
WOW…so helpful and well written…every detail of the project was clear and easy to read and understand. What a beautiful transformation! I look forward to seeing more.
LikeLiked by 1 person
You did a great job Taya explaining the do’s and don’ts. Very written and easy to follow along, you’re a natural!
LikeLike
Looks incredible!! It’s a dream white kitchen!!
LikeLike